This week didn’t quite go as planned. Our air conditioner stopped working on Monday, and we were without it for a few hours. So having to deal with that, plus make sure that Matt made it through several hours without air conditioning on a day with 100+ degree temps completely threw off my plans for the week. And then the curve ball of dealing with the unexpected changes in the hallway bathroom took up even more time that I had anticipated being able to dedicate to the studio. But isn’t that the way life works?
So it’s been a bit of a hectic week, but I was still able to make some progress in the studio. The progress is slow, but it’s steady, so at least I’m heading in the right direction. I haven’t had to tear out any more drywall or undo anything else that’s already done, so that’s always good news. 😀
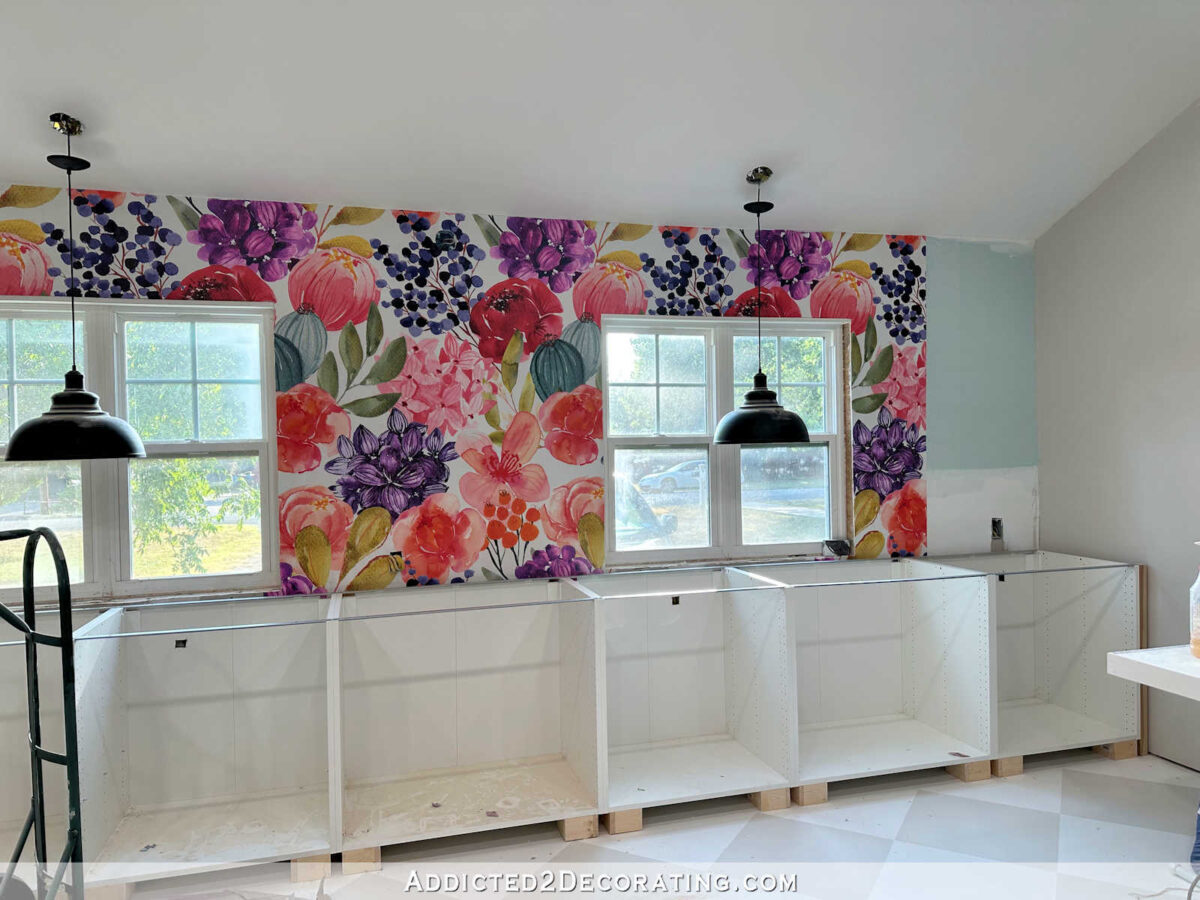
Earlier in the week, I showed y’all how I modified the IKEA Sektion cabinets to use on the long front wall of the studio. I got all of those installed, and now they’re ready for trim and a countertop.


Before I got sidetracked with the A/C and hallway bathroom countertop, my plan was to work on the countertop and have the upper cabinets put together in time for some men in our Wednesday night group to be able to lift those into place for me. But after losing almost an entire work day because of the A/C, I knew that goal wasn’t going to work out, so I decided to move on to the other cabinet section instead. That way, I can get all of the cabinets installed, then get all of the cabinets in both sections trimmed out, and then build both countertops at the same time.
But before I could install cabinets, I had to get that section of the room painted. Rather than paint the entire room at once, I’m having to do it in sections because of the things I’m having to work around. It’s not the most efficient way to work, but it’s fine. It’ll all get done. 🙂 But for now, I painted the area of the ceiling that is above this section of cabinets, and then I painted the part of the wall that is behind and beside this section of cabinets. I still have to go back and do that little section above the door.

I generally enjoy painting a room, but I can tell you right now that I’m not enjoying this one. I don’t like having to climb up and down a 10-foot ladder (I don’t like tall ladders), and I’m eventually going to have to drag out the 12-foot ladder. I’m dreading that. But I’m getting it done, section by section, slowly but surely. I’m very happy with the colors that I finally settled on — pure white ultra flat Behr ceiling paint for the ceiling, and Benjamin Moore Classic Gray for the walls (mixed in Behr Premium paint).

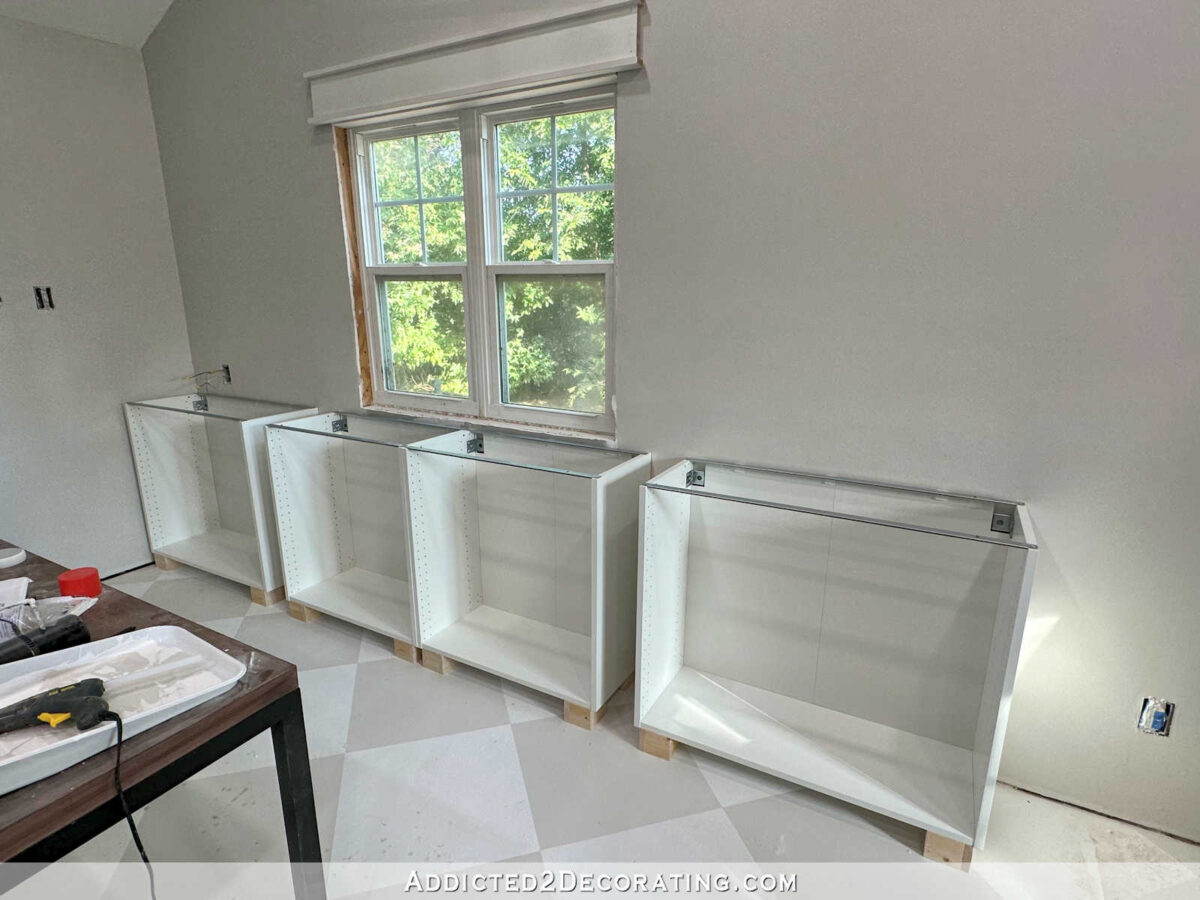
So once that section of the wall and ceiling were painted, I could get to the fun part — assembling and installing the cabinets. I made and added 3-inch feet to these cabinets just like I did for the ones on the long wall. (You can read more about that here.) Those feet don’t have to be pretty because they’ll be hidden behind trim.
I haven’t actually installed the cabinets yet (i.e., attached them to the wall) because the installation on these cabinets won’t be as straightforward as the other wall of cabinets. As you can see, this wall will require some spaces between the cabinets.

Since I’m using IKEA cabinets instead of building from scratch, I only had specific widths to choose from. I chose the sizes that would fill the space as much as possible, but the fit wasn’t nearly as good for this wall as it was for the long front wall. I know that I want the two middle cabinets to be right against each other (i.e., no space between them) and centered under the window.

But then that leaves spaces on either side of the cabinet in the corner. It needs a space between the left side and the wall of at least 1.5 inches, but then that leaves a 5-inch space on the right side of the cabinet.

I had thought about framing that out and having a slot for something useful, but I can’t think of any reason I’d need a 15-inch-deep, 5-inch-wide, 30-inch high slot in an office setting. If it were a kitchen, and the cabinets were 24 inches deep, it would be a great place for cookie sheets. But I can’t think of any use for this space, so I’ll probably just cover it with a 5-inch-wide spacer.

But whatever I do on that side, I’m also going to have to do on the other side in order to keep the whole thing symmetrical.

I’ll figure it out. It’s just going to take some thought and planning to get it just right.

I’m really hoping I can get these installed and then finally make some progress on the countertops this weekend. Barring any unforeseen circumstances, that’s the plan. We’ll see how that goes. 😀

Addicted 2 Decorating is where I share my DIY and decorating journey as I remodel and decorate the 1948 fixer upper that my husband, Matt, and I bought in 2013. Matt has M.S. and is unable to do physical work, so I do the majority of the work on the house by myself. You can learn more about me here.